How to install Windows Server 2019 in a VM with VMWare
Creating a virtual Windows Server test environment.

Creating a virtual Windows Server test environment.
Getting your hands dirty administrating Windows Server is the best way to learn Windows Server SysAdmin, but practicing on a production server can be dangerous and costly and building your own home lab to learn with is both prohibitively expensive and far from beginner-friendly.
In this tutorial, you’ll learn how to set up a Windows Server 2019 (or any other major release if your needs require so) instance in a VM and create a safe practice environment where you won’t have to worry about angry users or risking downtime.
After the initial set-up of the VM, you'll be free to hop into your virtual server just as if it were a real one mounted in a rack, running all the same software and tools you would on a production install. Also, you'll have the advantages of full control over the whole network, setting up snapshots (if using premium VMware) all without the huge resource, power, and maintenance overhead.
Step 0.5: Downloading a hypervisor
First of all, were going to need access to some kind of virtualization software. For this example, I’ll be using VMware Workstation Pro, a premium option. However, if you are a complete virtualization beginner premium software isn't necessary and the free version, VMware Player, will suffice. If you have Windows 10 Pro you can use Hyper-V. Another free option is the open-source VirtualBox package.
Whilst all the options are pieces of great software, I recommend starting with VMware player if you are new to VMs, to familiarise yourself with the VMware ecosystem and environment, as this software is most common in industry. Whichever package you choose the steps will remain mostly similar, with the difference mostly being menus looking slightly different, however, this guide is focused on VMware.
Step 1: Downloading the .iso file
Usually, to install an operating system we put a disk or USB in the machine with install files for the PC to book from. The process for VMs is almost exactly the same, except both the disk and drive are virtual, too.
Firstly we need to source the ‘virtual disk’, which will be an archive file with the ‘.iso’ extension. For most Linux operating systems this is quite straight forward, iso’s can be found on OEM and project websites easily for download. However, as with all things Microsoft, it's not quite so simple with Windows. We’ll source our copy of Windows from the Microsoft Evaluation Centre. The Microsoft Evaluation Centre will become a valuable resource for you as you experiment more with Windows and Microsoft products.
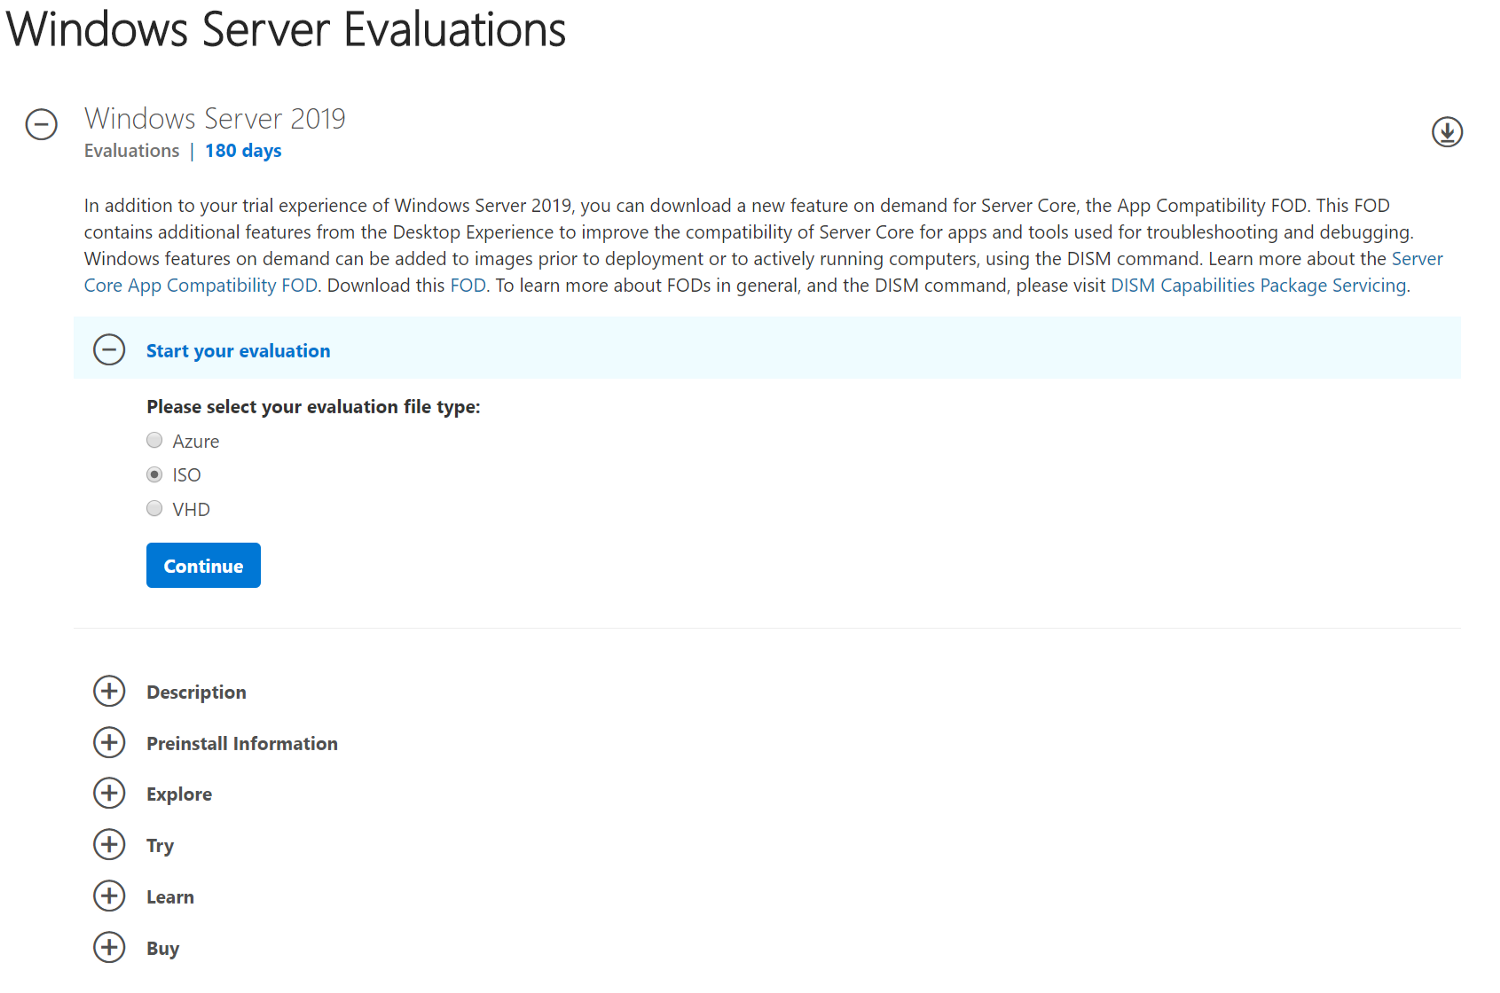
Make sure to select the correct version of Windows Server (2019 in this case) and ISO for the file type. You will then be asked to fill in your details (or John Doe’s 😉) then hit download and save the file somewhere memorable (Myself, I keep a dedicated folder for .iso files). This may take some time, as the file is over 4GB.
Step 2: Creating the VM
Firstly, select the option to create a new VM. In VMWare Player, this is a big obvious button on the right-hand side. in VMWare workstation pro you can either select ‘Create a New VM’ if you're on the home screen, or, simply select the same option from the File menu.
Then, select ‘Typical’ and hit next. On the next screen, you will be asked to select the installation media.
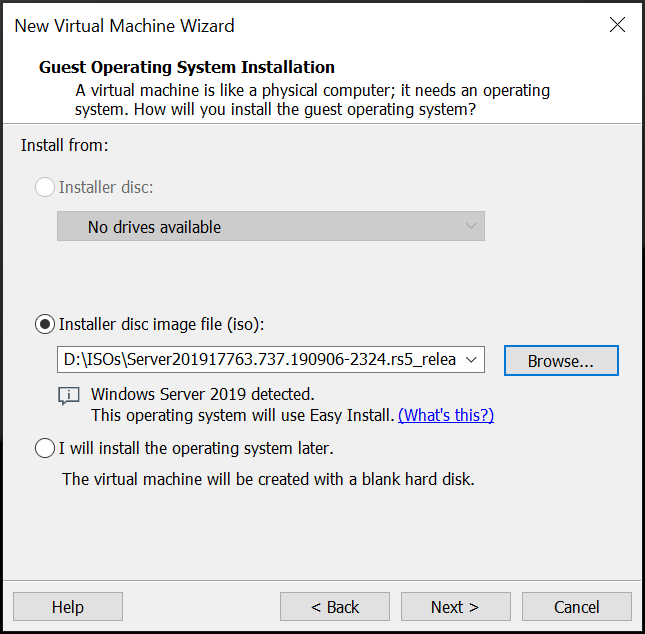
We’re using the second option here for a locally stored .iso, but if you had a physical install disk inserted in your host machine, you could select it from the first option.
To install from an iso, browse to where you saved the file we downloaded earlier then click OK.
You’ll notice that VMWare detects the OS contained in the iso and displays ‘Easy Install’. The Easy Install feature will select some options automatically and optimise the VM for the OS we are installing, saving us some manual work during the install process. This feature isn’t available for all OS installs, however, odds are a majority of operating systems you find yourself using will support this feature, however.
Click Next.
On the next screen, we can leave the product key box blank. As this is an evaluation copy of Windows we won't need it for now. Fill in the full-name and password as desired, this will create the Admin credentials on the PC for us automatically (this is part of the Easy Install feature). In the ‘Version of Windows’ dropdown, select the option you prefer, or if you don’t know what these mean, leave it on the default — datacenter — as this version has more features and is less restrictive.
Ignore the pop-up box reminding you there is no product key, click Yes.
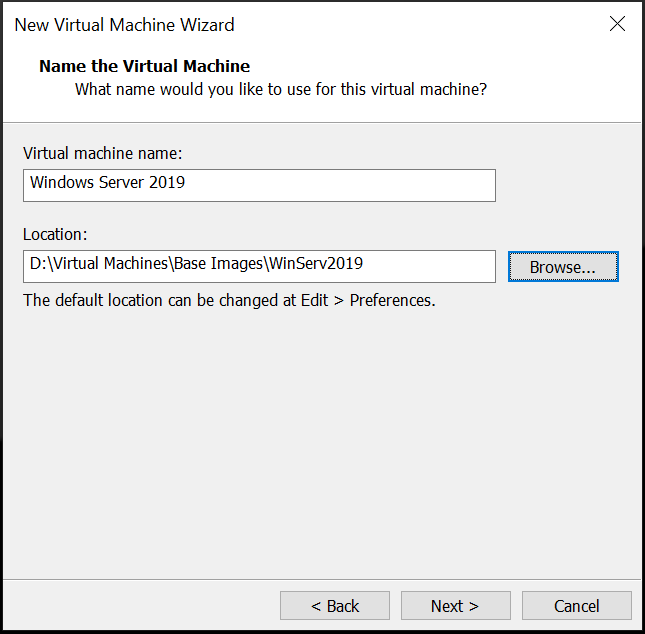
When you're asked about the install location, install it wherever you wish. If you're using VMWare Workstation Pro, I suggest creating a ‘Base Images’ file, or a location to save freshly installed machines, so you can quickly clone a new one fresh if you need a new machine quickly, to save the time-consuming process of installing from scratch every time.
As for HDD size, unless you plan on having a lot of storage space immediately, leave it at the default of 60GB.
Thankfully, VMWare is smart, so it won’t actually use 60GB of space on your host machine straight away, it just creates a cap for the VM at this size. You can always add new Virtual Hard Disks (.vhdx) later on.
Keep the default of multiple files for now.
As for customizing hardware, I’ll be leaving the defaults here. Because I intend to use this VM as a base image, whenever I create a new clone of this I’ll change the specs per each project, i.e. more RAM and Processors if I’m simulating a production environment, or less if I'm creating a Pentesting lab.
Click Finish.
Step 3: Installing the OS
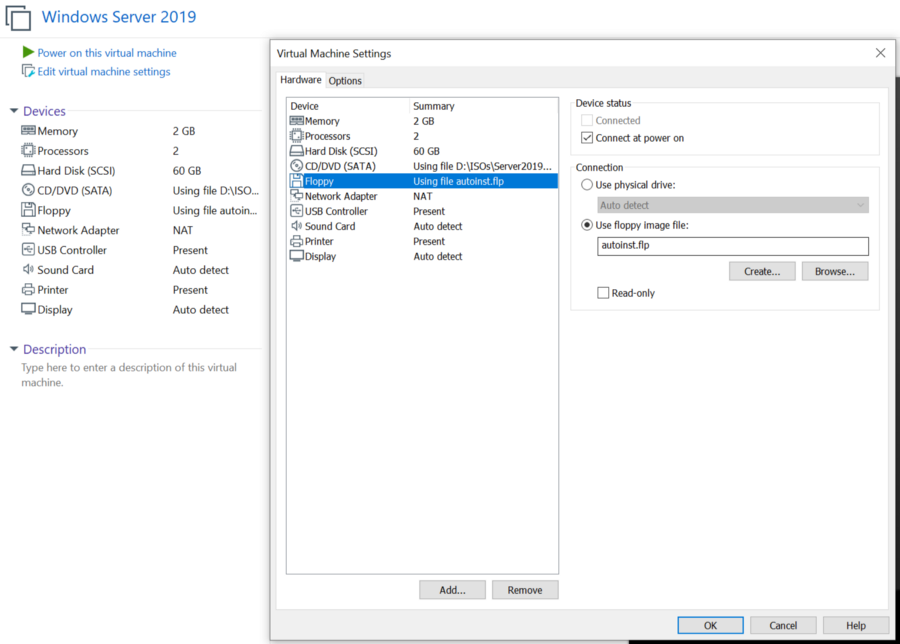
Now what happens next is a little, well, weird. If you try to power on the VM straight away and continue through the install, you will eventually be met with an error telling you that Windows can’t find the License Terms… (See below for an example). This error plagued me for so long, I can't even remember how long I spent googling to try and find a solution with no luck. It was only by pure fluke that I mentioned this issue to a colleague of mine who just-so-happened to have experienced this same issue himself and was able to offer a solution. (Many Thanks Smithy!!)
The long-and-short of it is that when we first create the VM, VMWare adds a floppy drive to the machine, which Windows then thinks contains a product activation file, which it doesn’t, so the install will keep getting stuck at this point. I would laugh about it being so silly if I hadn't wasted so much time trying to figure this out…
To solve this problem, first power the VM on and wait until Windows loads, then power off the VM, select the VM settings in VMWare and remove the floppy drive. To do this just click on the floppy drive in the left pane then select remove.
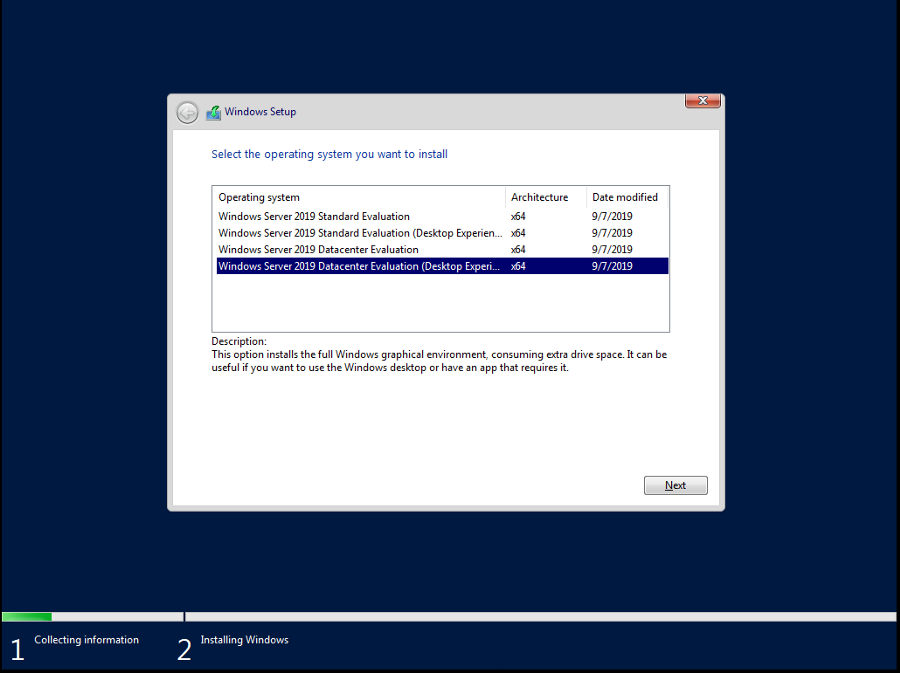
Moving on from this, we can now install the OS for real. Power on the VM and if prompted press any key. Next, select the appropriate language and region options for your usage, hit next, then install now. Next, you may be presented with a screen asking you to select a version of Server to install. Again, if you are unsure, select Datacenter, making sure to select the Desktop Experience option. If you don’t select Desktop Experience, you will install Server Core, which is GUI only and it not n00b friendly at all.
Following this carefully read the entirety of the license terms then agree and click next. For installation type, we will be using the custom option. The installer calls this the advanced method however most of the time you install Server you will find yourself installing this way.
Select Drive 0 and hit next. Wait as the installer works its magic.
After the installer is complete the VM will automatically reboot. Once it powers on again you may be asked to input an administrator password. If so, do so, then when you click next you will be taken to the lock screen. Typically in Windows, you will use Ctrl+Alt+Del to log in, however, this won't work in a VM. The method I use is Ctrl+Alt+Insert, however, you can also select ‘send Ctrl+Alt+Del’ from the VM menu in VMWare.
Now the install process is complete and you can use your VM like any other live Windows Server.
Step 4: Installing VMWare Tools
This step isn’t strictly necessary however it will add some serious quality of life improvements if you do. VMWare Tools is a package that allows the VM and your host machine to communicate easily, for example, to share files between the VM and your host by simple drag and drops or to copy and paste between the two devices.
To install VMWare Tools either select the pop-up bar beneath the VM window or find the option in the VM menu in the menu bar.
Then in the VM open ‘This PC’ and double click the VMWare Tools DVD, listed under ‘Devices and Drives’. Then continue through the install process like any other software install, selecting ‘Typical’ in the first menu. Then hit finish and restart the VM.
If you are using the free VMWare player this the final step and you have successfully installed Windows Server 2019! For Workstation Pro users, in steps 5 we will use an extra feature in the VMWare Workstation for some more quality of life benefits. The following step is optional.
Step 5: Creating a snapshot (Optional)
Because this is an evaluation version of Windows, it is only valid for 180 days. This means we would need to rebuild the VM every 180 days, which would be extremely tedious if we had an entire lab of machines to update.
To curb this, create a snapshot, naming it what you like (I went with ‘init’) so we always have a version to rollback to with 180 days on the clock.
And that's it! Finished! I hope you found this tutorial useful. Windows Server can be one of the most frustrating systems ever to debug and fix, so having a lab you can bin or reset every time it breaks is invaluable for speeding up the learning process. If you can think of any more ways to improve the install process please let me know!